Watercolours for Beginners – Introduction
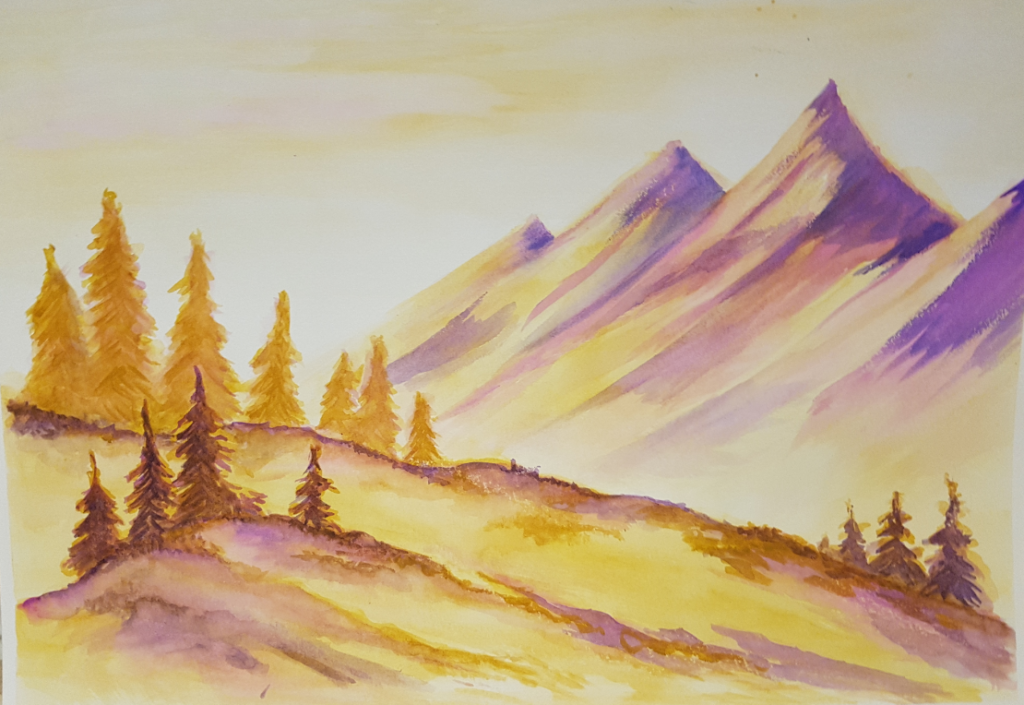
Learning to paint with watercolours for beginners. Painting with watercolor paint is endlessly rewarding. It has a very playful nature. Pigment and water often do what they like. They blend together to produce gorgeous patterns of color.
Watercolor paint is transparent. Watercolours is all about using lots of water and little colour/pigment. The water does all the work moving the pigment around the paper. It is not possible to paint light over dark colours. This means if you make a mistake it is difficult if not impossible to fix. These mistakes can lead to interesting patterns as the water carries the paint around the paper. No two paintings are the same.
Watercolor can be challenging for beginners. It requires practise and plenty of it. With these simple warm-up activities, you’ll begin to understand how watercolor really works, get comfortable with your paints, and hopefully come up with ideas for new creations. I will explain what equipment you will require.
Equipment
Watercolour painting only require a few materials ie brush, paper, paints and water.
-
Paints
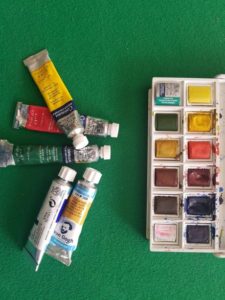
Watercolours for begginners are available in tubes and pans Tubes tend to have more pigment in them. Pans are small compact cake usually stored in container. Starter sets are available in both. You only need to buy primary colours (red, blue and yellow) to start as you can mix these colours to create other colours. There are warm and cool versions of each. Warm means it tends towards red and cool means it tends towards blue in colour. I also recommend starting with student quality eg Windsor & Newton Cotman or Daler-Rowney Aquafine*
How to use pans: Dip your paint brush in water. Dip your brush into pan to lift some pigment. Mix this on your palette.
How to use tubes: Squeeze out a very small amount eg pea size onto your palette or plate. Dip brush into water and mix with some of the colour to create a watery liquid. Again the strength of colour will depend upon your requirements.
I suggest to buy primary colours (warm and cool tones)
-
-
-
-
-
-
-
-
-
-
-
-
-
- Ultramarine Blue (warm) or Pthalo Blue (Green Shade) or Prussian Blue
- Cerulean Blue (cool)
- Cadmium Red (warm)
- Crimson Red or Alizarin Crimson (cool)
- Cadmium Yellow (warm)
- Lemon Yellow (cool)
-
-
-
-
-
-
-
-
-
-
-
-
2. Brushes
Watercolor brushes are designed to work with water. They need to hold alot of water (good reservoir) and have tips for accuracy.
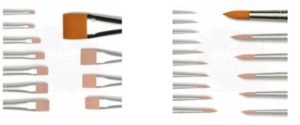
Get a selection of round and flat brushes. You can purchase synthetic or sable. You could start with synthetic as they are good and hardwearing. Sable can be a lot more expensive. Brushes are numbered and the higher the number, the bigger the brush. Richard Oliver* brushes are good starter brushes. Buy 1” or ½” flat brush if you intend in painting large washes eg landscapes.
3. Paper
It is extremely important to use good quality watercolour paper. If you use light paper, it will just buckle if lots of water is applied. Start off with a weight 140lbs/300gsm Watercolour paper can come in many formats eg pads, blocks, individual sheets. I suggest to start with cold pressed watercolour pads which are suitable for most work
4. 2 jars of water
One is to clean the brush and one is to add water to your brush.
5. Tissue/Kitchen Roll
to remove excess water from your brush
6. Palette/Plate for mixing colours.
You will need a palette/plate if you are using tubes of paints for mixing the colours. Pans Set usually have a mixing tray with it.
Colour wheel
Create a colour wheel. On the colour wheel, red blue and yellow are the primary colours. Create secondary colours eg blue and yellow will create green using your primary colours. Create tertiary colours by combining a secondary colour with a primary colour eg mix orange with red .
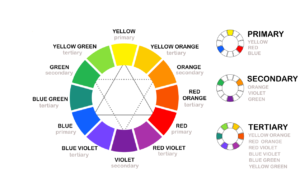
- Mix primaries colours to form secondary colour as follows: Mix blue and yellow to get green, red and yellow to get orange and blue and red to get violet/purple.
- After this create teritrary colours eg mix green with yellow to get yellow green colour and mix green with blue to get blue-green colour and mix orange with yellow to get yellow orange and mix orange with red to get red orange colour and mix violet with red to get red violet colour and mix violet with blue to get blue violet colour .
Watercolours for Beginners – Technique lessons
Practising techniques will get you comfortable with using watercolour paints. One of the most popular techniques is wet on wet which can be used in such things as landscapes, skies, washes. Painting onto wet paper achieves this technique as follows:
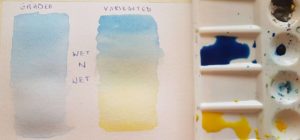
Lesson 1 (Graded)
- Wet your brush with water and apply to a piece of watercolour paper
- Pick up some paint with your brush and mix with little water on your palette.
- Now paint onto your wet surface sweeping the brush from left to right and vice versa
- As you move down the page you will notice that the paint fades. This is called graduation
Lesson 2 (Variegated)
- Wet a piece of paper with your brush again
- Paint left to right half way down the wet piece of paper
- Next paint using a different colour from bottom of wet piece of paper up to the other colour.
- The colours will blend. This is called variegated
- Leave both to dry.
- The colour become less vibrant and textures are created with the watercolour paper.
Lesson 3
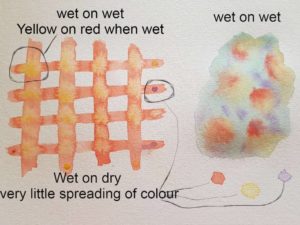
- Wet the paper in stripes
- Pick up mixed paint with your brush and paint along the stripes
- Pick up to some more paint and paint accross the stripes
- As the paints dry, the paint on dry paper with dry with clear lines
- The paint using wet n wet, will dry with fuzzy appearance
- Next step, pick up a different colour and drop onto the painted stripes in various places
- The paint dropped in the wet area will spread out and merge or mix with the other colour
- The paint dropped on dried area will not spread and dry with clearer appearance
Lesson 4
- Try wetting paper and add colour which works as background eg green
- Add different colours onto this
- in the sample above, yellow,red,purple have been added
- The colours spread out and merge with each other
- You will notice that red and yellow have merged and formed orange colour.
Wet on Dry, Flat Even Wash, Graded Wash, Variegated Wash, Salt Texture, Dry Brush, Lifting out, Sponging, Wax resist, Scumbling are examples of other techniques. Our foundation course covers these techniques. Learning to paint with watercolours for beginners is fun and easy!
The world is your oyster now. Enjoy!